 Skip to content
How To Clean And Maintain Vape
- by puff paradise
Cleaning your vape is essential if you want consistent performance, better flavour, and a longer-lasting device. Over time, e-liquid residue builds up in the tank, mouthpiece, and coil. This can affect taste, cloud production, and even the functionality of the device. Routine maintenance keeps your vape running efficiently while also improving hygiene. Whether you're switching flavours or simply using your device daily, regular cleaning is a must.
Cleaning involves disassembling your device and thoroughly rinsing or wiping each part, especially the tank, mouthpiece, coil, and battery connections. Coils can be cleaned to extend their lifespan, though they eventually need replacing. The mouthpiece should be sanitised regularly to prevent bacterial buildup, and external surfaces should be wiped clean to maintain device hygiene. Built-in coils in disposable vapes can't be cleaned, and attempting to do so can be unsafe. In contrast, refillable vape kits allow for full cleaning and maintenance.
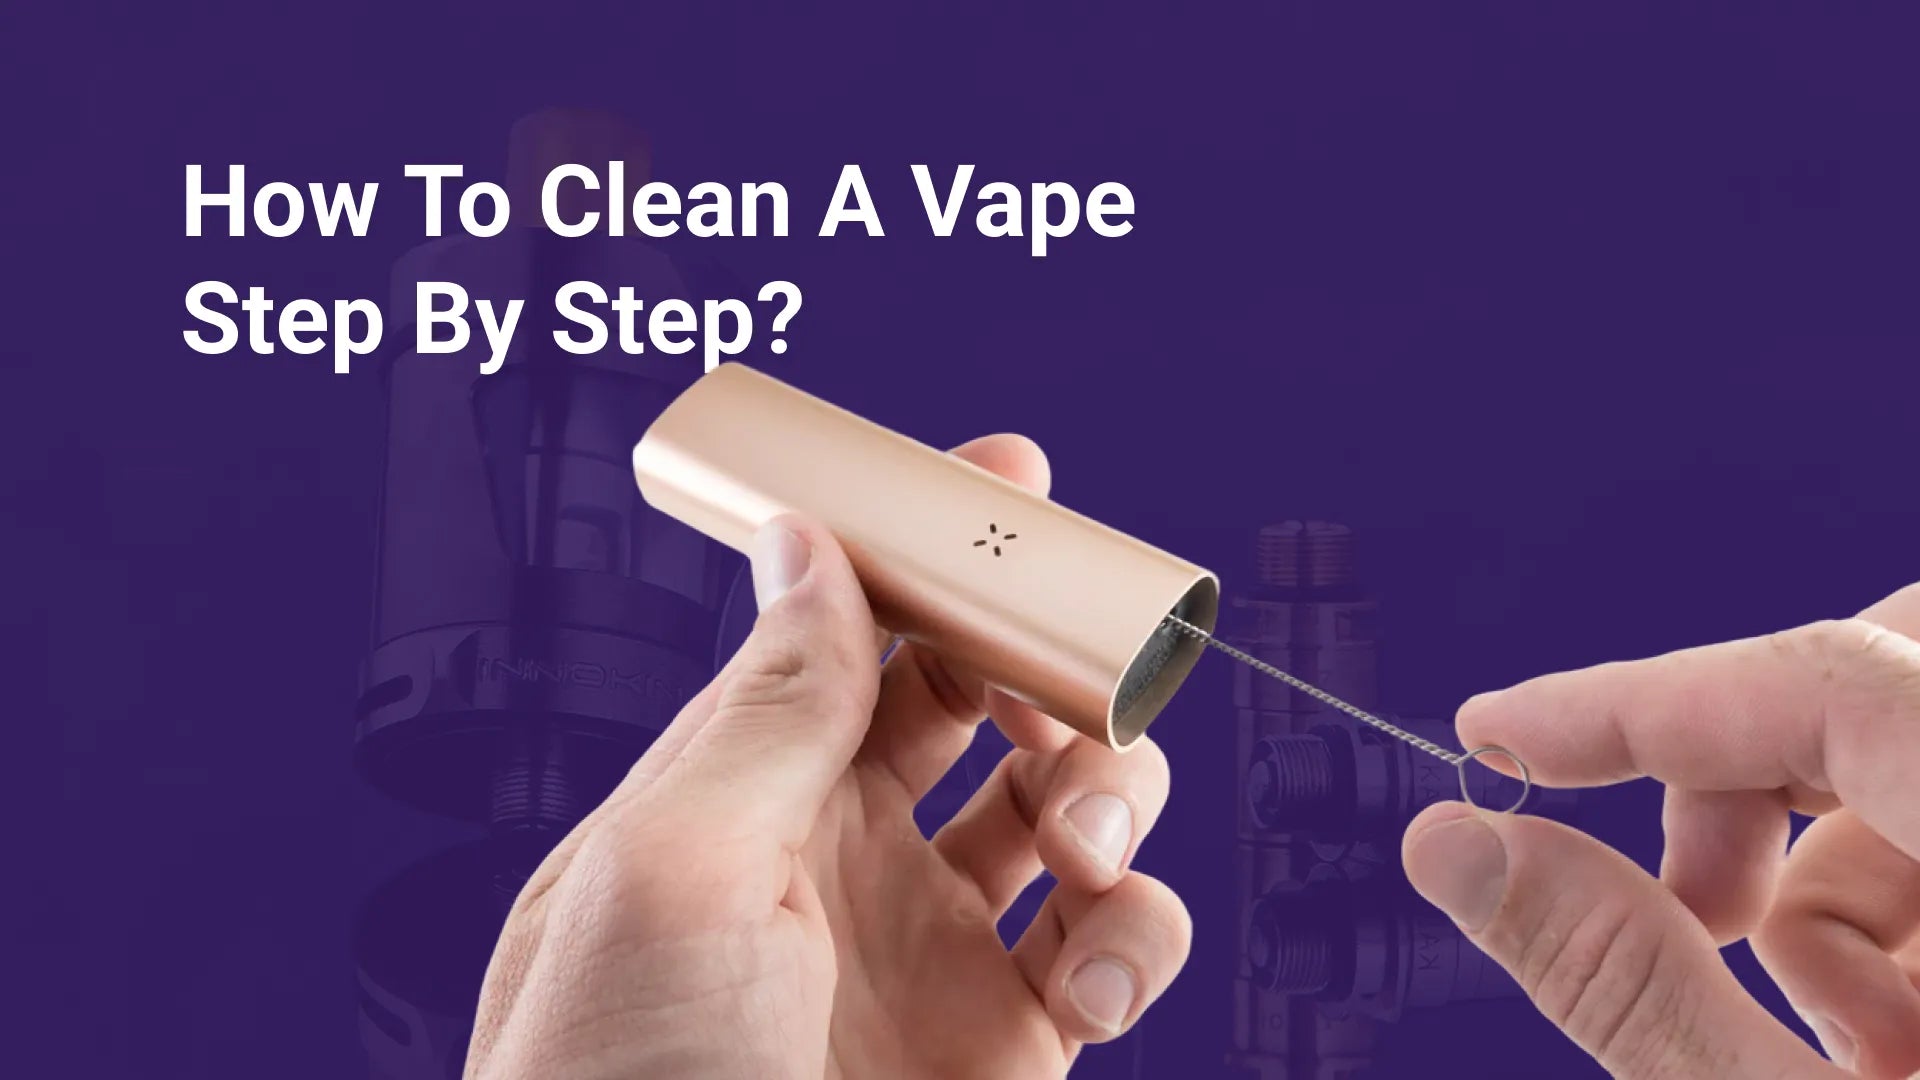
How to Clean a Vape Step by Step
A gunked-up vape ruins flavour and performance. Proper maintenance extends the life of your vape and ensures consistent performance. Follow this quick cleaning routine to keep it in top shape.

1. Preparing for Cleaning
Before you begin cleaning your vape device, it's important to gather the right tools and follow basic safety precautions. This not only helps prevent damage but also ensures each component is handled with care, keeping your device performing at its best.

What You’ll Need:
-
Soft cloth or paper towels
-
Warm water
-
Dish soap
-
Isopropyl alcohol (70–90%)
-
Cotton swabs or Q-tips
-
Alcohol wipes
-
Small bowl
-
Tweezers (optional)
Start by turning off your device and removing the battery if applicable. Carefully disassemble all removable parts like the tank, mouthpiece, and coil. Keep each part organised, so reassembly is easy.
2. Cleaning the Vape Tank
Cleaning your vape tank is one necessary step towards a cleaner taste, better clouds, and less wear on your device. Over time, e-liquid residue builds up along the walls of the tank, leaving behind sticky layers that interfere with both flavour clarity and vapour output. This gunk can also cause uneven heating, which puts extra strain on your coil and reduces the overall performance of your vaping device. A neglected tank not only alters how your vape tastes but also shortens its lifespan.

Regular tank cleaning becomes even more important when switching e-liquid flavours. Without cleaning, lingering notes from previous juices, especially sweet or menthol-heavy ones, can taint your new flavour profile.
Here’s how to properly clean your vape tank using basic supplies:
-
Disassemble the Vape Tank: Unscrew the base and top, remove the coil head, and take off the drip tip.
-
Rinse the Components: Rinse all tank parts (except the coil) under warm water to clear out e-liquid and debris.
-
Soak in Mild Soap Solution (Optional): For deeper cleaning, soak parts in warm water with mild dish soap.
-
Clean Stubborn Residue: Use a soft brush or cloth for residue; clean the mouthpiece with a cotton bud dampened in alcohol.
-
Rinse and Dry Thoroughly: Rinse all components again, then dry with a towel and let them air dry completely.
-
Reassemble and Enjoy: Put the tank back together, fill with your preferred e-liquid, and enjoy a cleaner, fresher vape.
When switching between flavours, a full, deep clean isn’t always necessary. A quick rinse with warm water is often enough to eliminate most lingering flavour. However, listed below are the steps you need to follow while cleaning a vape tank when switching flavours:
-
Empty the Tank: Remove the tank from your device and discard any remaining e-liquid.
-
Disassemble the Tank: Unscrew the tank from the mod, remove the coil, and separate all parts including the drip tip.
-
Rinse Under Warm Water: Hold each component under running water to remove residue.
-
Optional Soak: Soak parts in warm water, with or without a small amount of washing liquid, to loosen stubborn buildup.
-
Dry Thoroughly: Pat dry with a paper towel and let the components air-dry until completely moisture-free.
-
Reassemble the Tank: Reattach the coil, screw all parts back together, and re-connect the tank to the device.
-
Fill with New Flavour: Add your new e-liquid and enjoy a fresh flavour experience.
For best results, consider replacing the coil when changing flavours. Coils absorb e-liquid and often retain the previous flavour even after cleaning. If you're not replacing the coil, take a few dry puffs at low wattage to help evaporate any leftover liquid from the wicks before filling them with a new flavour.
3. Cleaning the Vape Coil
Cleaning a coil can temporarily improve performance by removing gunk, restoring some flavour, and extending its lifespan. However, it’s not a permanent solution. If your coil is burnt or too far gone, no amount of soaking or scrubbing will bring it back.

A dirty coil often causes a burnt aftertaste, weak flavour, and lacklustre vapour. Cleaning it can make a noticeable difference, especially if the buildup is moderate. Cleaning your vape coil isn’t complicated, but it does require a bit of patience. The goal is to remove residue without damaging the coil or wick. Here’s how to do it properly:
-
Rinse Under Warm Water:
Remove the coil from the tank carefully. Rinse it thoroughly under warm running water to flush out loose debris and leftover e-liquid. -
Soak in Warm Water:
Submerge the coil in a bowl of warm water for 20–30 minutes. This helps loosen stubborn buildup and preps it for deeper cleaning. -
Optional Cleaning Solution:
For coils with more grime, soak them in ethanol, vinegar, or cheap vodka for a few hours. This breaks down thicker residue. Rinse well afterwards to avoid lingering tastes. -
Rinse with Distilled Water:
After soaking, rinse the coil with distilled water. Unlike tap water, it won’t leave behind minerals that could affect your vape. -
Dry Thoroughly:
Set the coil on a clean towel or dish rack and let it air dry fully. This is critical—any moisture left inside can cause short circuits or performance issues. -
Optional: Use an Ultrasonic Cleaner:
For advanced users, an ultrasonic jewellery cleaner can deliver a deep, even clean. Follow the device’s instructions if you go this route.
Not all coils are created equal, and cleaning depends heavily on the type you’re working with. There are two major categories of coils, Built-In Coils and Replaceable Coils
Built-In Coils are sealed inside the pod and can’t be removed. You won’t be able to clean the coil directly. Instead, maintain the pod by wiping the mouthpiece and magnetic connectors regularly. Use a paper towel, and if needed, a mild cleaning solution to kill germs and keep residue in check. But when performance drops, the only fix is a fresh pod.
Replaceable Coils give you more flexibility. You can remove them, clean them using the steps above, and potentially get a few extra days of solid performance. There comes a point when cleaning won’t cut it anymore. Here’s how to know it’s time to toss the coil:
-
Burnt taste: Once the wick is scorched, it’s game over. Replace the coil immediately.
-
Muted flavour: If your juice tastes flat, the coil may not be heating evenly anymore.
-
Weak vapour: Less cloud production usually means a clogged or dying coil.
-
Gurgling or leaking: These signs often point to a failed seal or bad wicking.
-
Rough throat hit: Harsh draws can indicate a burnt or damaged wick.
-
Resistance changes: Fluctuating ohm readings mean the coil is unstable.
Most coils last 1 to 2 weeks, depending on usage. Sweet or thick e-liquids, high wattage settings, and heavy vaping will burn through coils faster. To extend coil life, always prime your coil, stay within recommended wattage, clean your tank regularly, and avoid dry hits.
4. Cleaning the Mouthpiece
The vape mouthpiece is a hotspot for bacteria and residue buildup, mainly because of how and where it’s used. Since it directly touches the mouth, it easily picks up germs from saliva and the surrounding skin. Add to that the condensation that forms during each inhale, this moisture mixes with leftover e-liquid and creates a damp, sticky surface, which becomes the perfect environment for bacterial growth.

E-liquid itself can leave behind layers of residue, especially if you’re using thick or sweet flavours. If the mouthpiece isn’t cleaned regularly, this gunk builds up fast. On top of that, storing your vape in a pocket or bag exposes it to dust, dirt, and other particles, which stick to the already-moist surface.
There’s also the issue of thirdhand vaping, residue from vapour can cling to surfaces, including your device, and reintroduce chemicals when you use it again. With regular upkeep, you can prevent most issues and maintain a smooth vaping experience. Here's a professional and straightforward step-by-step guide to help you clean your mouthpiece effectively.
-
Disassembly (if applicable):
If the mouthpiece can be removed from your vape device, gently disassemble it. Refer to your device's manual if you're unsure how to do this. -
Initial Rinse:
Rinse the mouthpiece under cool running water to remove loose debris or e-liquid residue. Avoid hot water, which can damage plastic parts or warping-prone materials. -
Cleaning with Soap and Water:
Apply a small amount of mild, unscented dish soap to the mouthpiece. Use a soft brush, such as a toothbrush, to gently scrub both the interior and exterior. Focus on grooves and hard-to-reach areas where buildup often hides. For stuck-on grime, you can soak the mouthpiece in warm soapy water for a few minutes before scrubbing. -
Thorough Rinsing:
Rinse the mouthpiece under cool water to remove all traces of soap. Any leftover soap can affect the flavour of your vape and possibly irritate your throat. -
Drying:
Pat the mouthpiece dry with a clean towel or paper towel. Let it air dry completely before reattaching it to your vape. You can also use a mouthpiece swab to dry the inside thoroughly. -
Optional Deep Cleaning:
For extra sanitation, soak the mouthpiece in a 1:1 mixture of white vinegar and water for 30 minutes, then rinse thoroughly. Alternatively, use a hydrogen peroxide and water solution for the same duration. Always rinse well to ensure no residue remains. -
Reassembly (if applicable):
Once the mouthpiece is dry, reattach it to your device securely.
Tips for Ongoing Maintenance:
-
Clean the mouthpiece after every few uses, especially if you’re a frequent vaper.
-
Store your device in a clean, dust-free environment to prevent additional residue buildup.
-
If you notice sticky residue, discolouration, or an odd taste, clean the mouthpiece immediately.
-
For hygiene-focused users, consider wiping the mouthpiece with an alcohol swab before each session.
5. Cleaning the Battery and Connections
A clean vape battery isn’t just about aesthetics, it directly impacts how well your device functions. When dirt, e-liquid residue, or dust builds up on your battery or its contact points, it interferes with the electrical connection between the battery and the tank or coil. That weak connection means your device has to work harder, leading to inconsistent power delivery, reduced vapour output, slower firing times, or even total misfires.

Residue buildup can also cause the battery to overheat, which is not only bad for performance but also a serious safety risk. In some cases, it can shorten your battery’s lifespan or damage internal components over time.
Keeping your battery clean ensures smooth conductivity, stable voltage, and efficient energy transfer, all of which translate to better vapour production, stronger flavour, and more reliable sessions. Plus, it helps maximise vape battery life, giving you more charge cycles and fewer surprises mid-vape. Regularly wiping the contact points with a dry cloth or alcohol swab is a simple fix that pays off in smoother hits and longer-lasting gear. Here’s a simple, professional step-by-step guide to help you clean your vape battery safely and effectively:
-
Disconnect the Battery
If your device has a removable battery, take it out. If not, make sure the vape is turned off before proceeding. This prevents short circuits and keeps you safe during cleaning. -
Wipe the Battery Area
Use the damp cloth to gently clean the surface around the battery and compartment. This clears away dust, e-liquid residue, or debris that may interfere with performance. -
Clean the Battery Connection
Dip a cotton swab in rubbing alcohol and use it to clean the contact points where the battery connects to the device. This removes built-up residue that can block power flow. -
Use a Brush for Stubborn Residue (Optional)
If the contact area is especially dirty, gently loosen grime with a small brush before wiping it away with an alcohol-dampened swab. -
Dry Thoroughly
Allow all components to air dry completely. You can also use a dry cloth to ensure no moisture remains, which could damage the battery or cause misfiring. -
Reassemble the Device
Once everything is dry, reinsert the battery (if applicable) and power on the device to make sure it’s working properly. Clean connections mean smooth, consistent performance.
6. Cleaning a Disposable Vape
You can’t and shouldn’t clean a disposable vape. These devices are built for single use and are sealed units, meaning they’re not designed to be opened, disassembled, or maintained in any way. Attempting to clean one can damage the internal components, compromise safety, and void any manufacturer guidelines. Still, the mouthpiece and external surfaces can be maintained.

-
Gently wipe the mouthpiece with an alcohol wipe.
-
Use a dry cloth to remove dust or debris from the device body.
-
Do not attempt to open or submerge the device.
Disposable vapes come pre-filled with e-liquid and have a fixed coil and battery. Once the e-liquid runs out or the battery dies, the device is meant to be discarded. Trying to clean or tamper with it can lead to leaks, malfunctions, or even short circuits. Unlike reusable vapes, which are built for ongoing maintenance, disposables are a grab-and-go option—use it, enjoy it, and bin it when it's done.
If you're looking for something that can be cleaned and reused, it’s better to switch to a refillable vape kit with replaceable coils and a detachable tank. That’s the only route if long-term maintenance is what you're after.
7. Fixing a Clogged Vape
Vape clogs are mostly caused by thickened e-liquid, oil buildup, or blocked airflow—usually the result of chain vaping, condensation inside the mouthpiece, temperature extremes, or letting your vape sit unused for too long. When oil gets too thick (especially in cold weather), it doesn't flow well and can block the coil or mouthpiece. If left uncleaned, it hardens and messes with both flavour and airflow.

Here’s how to unclog a vape cartridge:
-
Inhale slowly or blow gently through the mouthpiece to warm and loosen the oil.
-
Preheat your vape if it has the function, or take slow pulls to warm the oil manually.
-
Use a hair dryer on the lowest hot setting for 15–30 seconds to melt built-up residue.
-
Unclog the mouthpiece using a straightened paper clip, scrape out hardened oil inside.
-
Clean air holes with a cotton swab dipped in isopropyl alcohol to remove gunk around the threading.
-
Avoid chain vaping. Give your vape a 30-second break between hits.
-
Store it upright in a cool, dry place to prevent oil from flooding the coil or mouthpiece.
Keeping your vape clean and storing it right can prevent most clogs before they even start.
What Are the Common Mistakes to Avoid While Cleaning a Vape?
To keep your vape performing well and tasting clean, it's important to avoid a few common mistakes. First, don’t skip regular cleaning. A dirty vape can cause burnt or unpleasant flavours, clog the device, and even impact your health. Clean your tank, coils, and mouthpiece at least once a week or when you switch flavours.
Use the right cleaning solutions. Harsh chemicals can damage your device. Stick to mild soap and warm water, or cleaners made specifically for vape gear. Always dry the parts completely before putting everything back together.
Store your vape upright in a cool, dry place. Laying it on its side can lead to leaks or e-liquid pooling in the wrong places. Also, don’t overfill the tank. Leaving a small air gap prevents leaks and helps the coil work properly.
Always prime new coils before use. This means letting them soak in e-liquid for a few minutes before your first puff. It helps prevent burnt hits and extends the life of your coil. Lastly, change your coils regularly. A burnt taste or weak vapour usually means it’s time.
Never share your vape. It spreads germs and bacteria, especially if the mouthpiece isn’t cleaned. Keep it personal, and keep it clean.
Is It Safe to Clean a Vape With Rubbing Alcohol?
Yes, it is generally safe to clean your vape with rubbing alcohol, especially if you're dealing with metal, ceramic, or glass components. Isopropyl alcohol works well to remove stubborn residue and sanitise the parts. You can soak the components or simply wipe them down with a cloth or cotton swab soaked in alcohol.
Avoid using it on any wooden parts, as alcohol can cause damage to the material. After cleaning, rinse everything thoroughly with water to remove any leftover alcohol. Let all parts dry completely before putting the vape back together. Never clean your vape while it’s powered on or plugged in.
How to Clean Vape Battery Without Alcohol?
To clean your vape battery without using alcohol, start by wiping the exterior with a soft, dry cloth or cotton swab. This helps remove dust, fingerprints, and light residue. Avoid using any liquids directly on the battery. For the connector area, where the battery attaches to the atomizer, use a dry cotton swab to gently clean away any dirt or leftover e-liquid. Keeping this part clean helps maintain a strong connection and smooth performance. If any water gets on the battery by accident, dry it immediately with a clean cloth. Then, let it air dry completely before using it again to avoid short-circuiting.
Can I Clean My Vape Coil With Water?
Yes, you can clean your vape coil with water, but it needs to be done properly to avoid damaging your device. Start by removing the coil and rinsing it under warm tap water to get rid of loose debris. This helps loosen any built-up residue on the surface.
For a deeper clean, soak the coil in warm water for 20–30 minutes. You can also use vinegar, ethanol, or even cheap vodka for a more thorough soak. After soaking, rinse it again, preferably with distilled water to remove any lingering solution.
Once rinsed, let the coil air dry completely. Make sure no moisture is trapped in the wicking holes. You can use a small blower to speed this up, but never rush the drying. Vaping with a wet coil is a bad idea. It could damage your device or create hot steam.
Cleaning is a temporary fix. Coils still wear out and need replacing regularly. After cleaning, check for any signs of damage before popping it back into your vape.
How Often Should I Clean My Vape?
You should clean your vape regularly to keep it performing well and tasting fresh. The vape tank or clearomiser needs cleaning every time you switch e-liquid flavours. This prevents leftover flavours from mixing and ruining the experience. A quick rinse or light clean is usually enough for this.

When it's time to replace the coils, typically every 2 to 4 weeks, you can do a deeper clean. Soaking the components in isopropyl alcohol (except the coil) helps remove buildup. Let everything dry fully before putting it back together. For vape pods with replaceable coils, clean them whenever you install a new one. This helps maintain flavour and prevents clogging or gunk buildup. Here’s a simple breakdown:
|
Component |
Cleaning Frequency |
|
Tank/Clearomiser |
Every time you change e-liquid flavours |
|
Coils |
Replace every 2–4 weeks; clean during change |
|
Vape Pods |
Clean with each coil replacement |
|
Full Device |
Every few weeks for a thorough clean |
What Happens if I Don’t Clean My Vape?
If you do not clean your vape regularly, it can significantly compromise both performance and hygiene. Residue from previous e-liquids, especially those with high vegetable glycerin content or strong flavours, tends to accumulate on the tank walls and coils. This buildup results in "ghost flavours", unwanted buildup of old e-liquids that interfere with the taste of new ones.
Over time, this residue can clog air vents and airflow channels, reducing vapour production and efficiency. E-liquid seepage may also affect the battery connections, potentially causing misfires or short circuits. In many cases, users report a persistent burnt taste, often due to carbonised residue interacting with dry or overused coils.
Beyond performance issues, hygiene becomes a concern. A neglected mouthpiece can harbour saliva, debris, and bacteria, posing potential health risks when inhaled. In rare but serious cases, prolonged exposure to residual oils and particles may contribute to respiratory issues such as lipoid pneumonia.
